Repurposing a Google GSA (Google Search Appliance) – A step-by-step how to guide
So, you have a GSA (Google Search Appliance) which has run out of license, and you are wondering if it is possible to re-purpose/re-use/crack the very well specified hardware? Yes, it absolutely is!
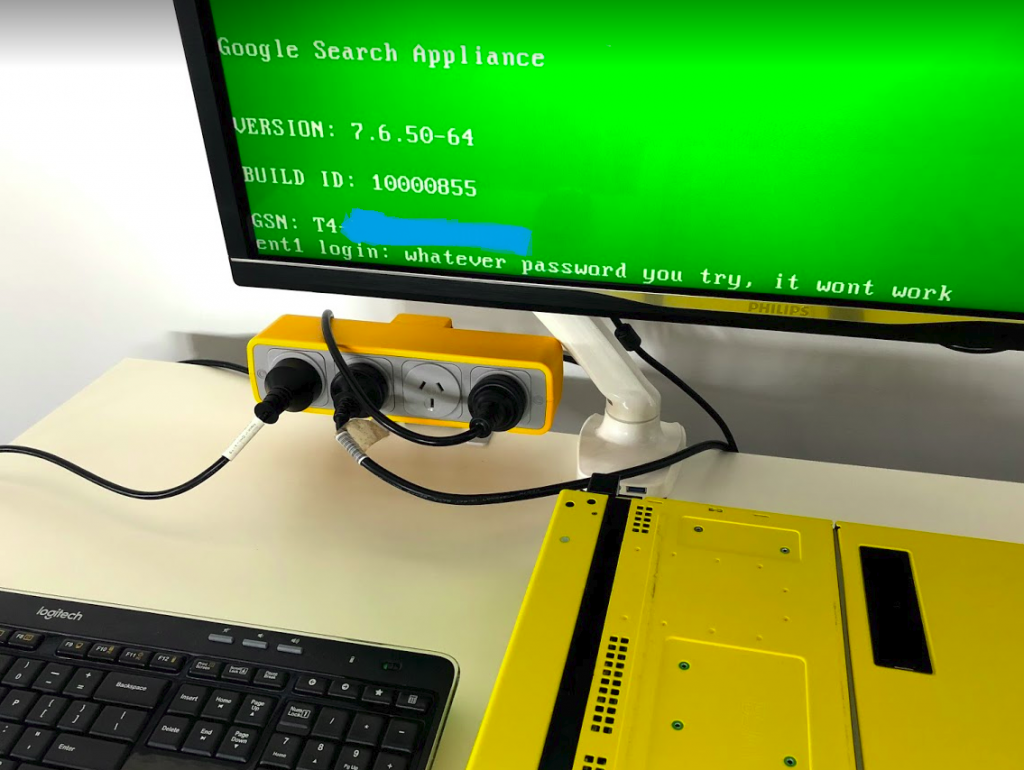
By default, the GSA runs a custom BIOS on a Dell server (R700, R710, R720), is password protected, and runs a variant of CentOS. Prior to running these steps, the GSA will not allow you to access the BIOS, or install your chosen operating system. When you connect a monitor, keyboard and mouse, all you get to see is an ent1 login screen. This password is never known to anyone outside of Google, including customers and partners.
At a high-level, you’ll need to play with motherboard jumpers (BIOS protection and NVRAM clear), format the volume and apply a regular Dell server BIOS.
The following steps have been tested on T2, T3 and T4 variants on the GSA.
WARNING: YOU ARE PERFORMING THE FOLLOWING STEPS AT YOUR OWN RISK. THESE STEPS WILL REMOVE THE DEFAULT GSA OS AND SOFTWARE
Pre-requisites
You will need a bootable memory stick. I use a USB stick which boots into a Windows 10 installation. This is a perfectly workable solution, as you can press SHIFT – F10 to open a command prompt, and use a Wintel version of the downloaded Dell BIOS installer complete with GUI.
Identify the type of GSA you are re-purposing, and download the appropriate Dell BIOS file.
T2 or T3- Download the following file or newer from the Dell website R710_BIOS_4HKX2_WN64_6.4.0
T4 – Download the following file or newer from the Dell website BIOS_CR1RR_WN64_2.5.4
Copy the downloaded Dell bios file onto your bootable USB stick, into a folder called “BIOS”.
You will require a monitor, keyboard and mouse.
I have published 2 sets of instructions; ‘text based’ and ‘with pictures’. Please scroll down the page to view the ‘with pictures’ version of the instructions.
The re-purposing process (text based)
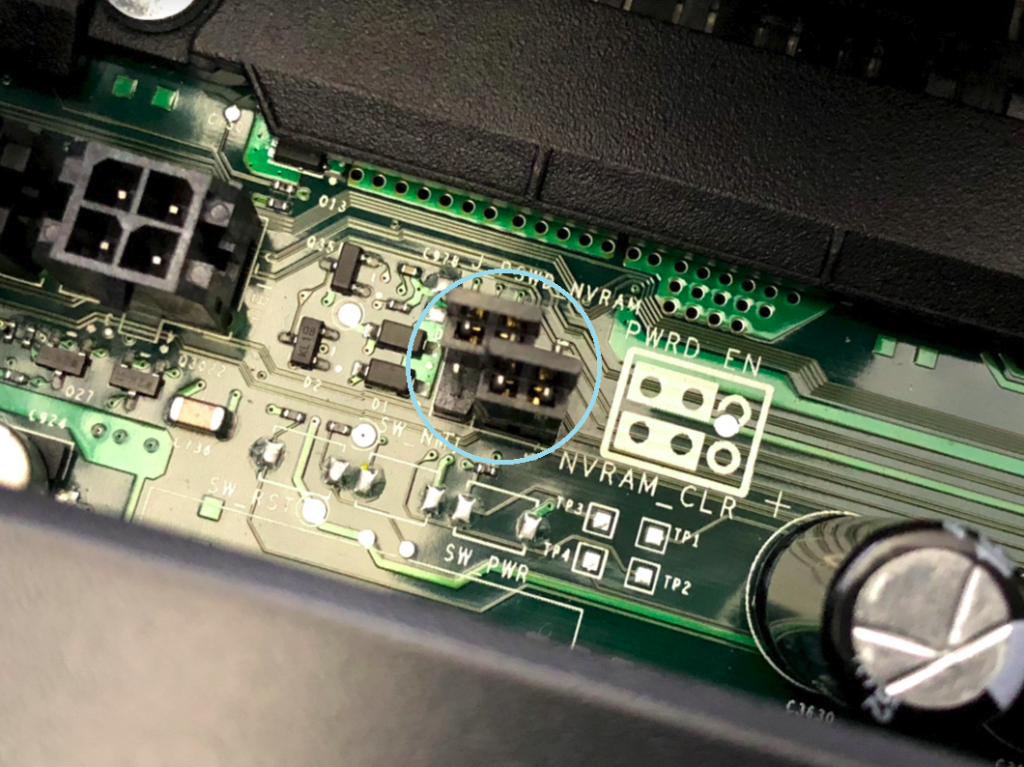
- Do not connect any power to your GSA just yet. Open the top lid of the GSA, and change the ‘clear nvram pin’ to yes, and the ‘bios password pin’ to no. The location of the nvram and bios password motherboard pins will be shown clearly on the inside of the top lid.
- Pop the server HDD disks out, and leave them hanging from the front of the server.
- Plug in your bootable USB stick. I usually plug the USB stick into the USB port on top of the motherboard.
- Re-install the top lid of the GSA.
- Connect your monitor, keyboard and mouse, and plug in the GSA power.
- Power on the GSA.
- Press CTRL – R when prompted by the BIOS, and enter the RAID configuration screen. Clear all of the configuration, including all volumes.
- Reboot the GSA.
- Allow the GSA to boot into your USB stick (Windows 10 in my case). Press SHIFT – F10 when at the installation prompt to launch a command prompt.
- Navigate to c:\BIOS
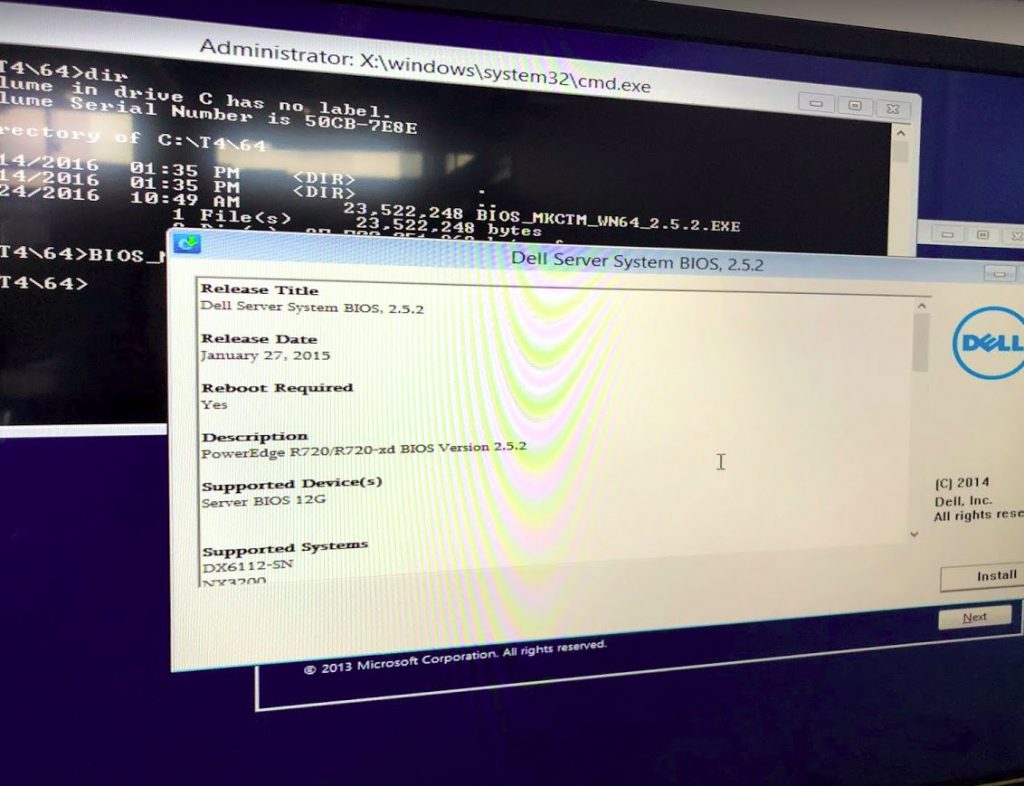
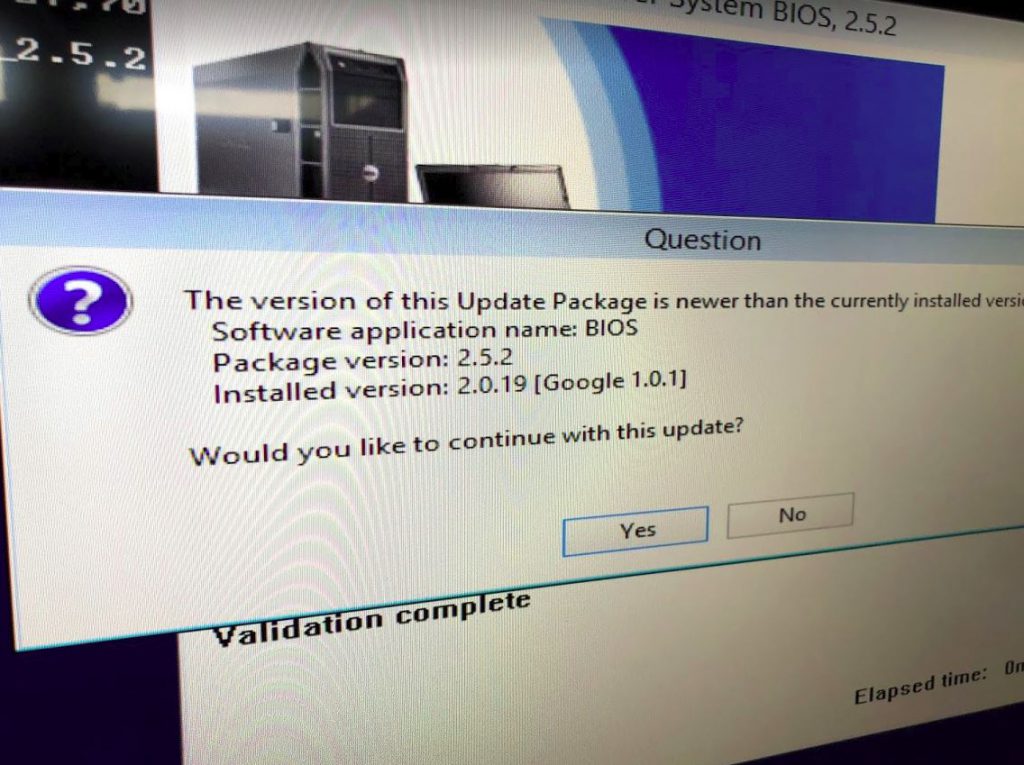
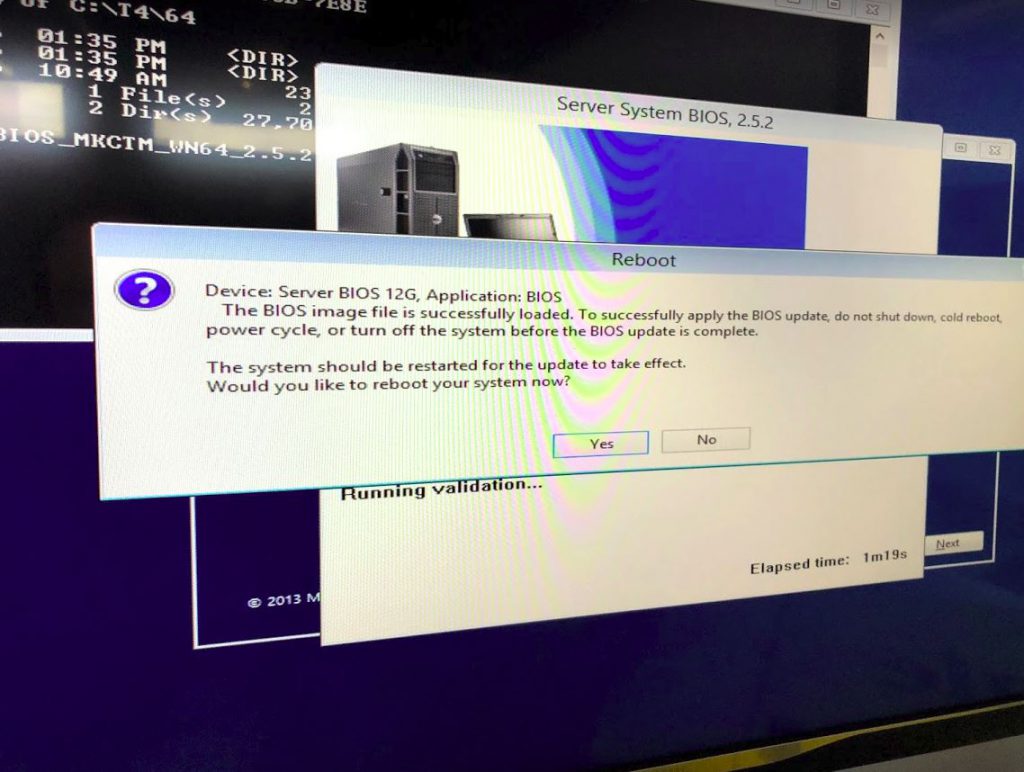
- Run your Dell supplied BIOS file (the one relevant to your GSA model: T2. T3. T4)
- Reboot when prompted.
- Allow the GSA to continue booting, as the BIOS will have a second part to check and install. Reboot when prompted.
- Allow the GSA to boot a final time, and shutdown the server once your bootable stick is back at the Windows 10 install prompt. Remove power.
- Open the top lid of the GSA, change the ‘clear nvram pin’ to no, and leave the ‘bios password pin’ at no.
- Remove your bootable USB stick.
- Re-install the top lid of the GSA.
- Pop in the server HDD disks.
- Plug in the GSA power.
- Power on the GSA.
- Press DEL when prompted and check full access to the BIOS.
- Done. The server is now ready to have your chosen OS loaded.
The re-purposing process (with pictures)
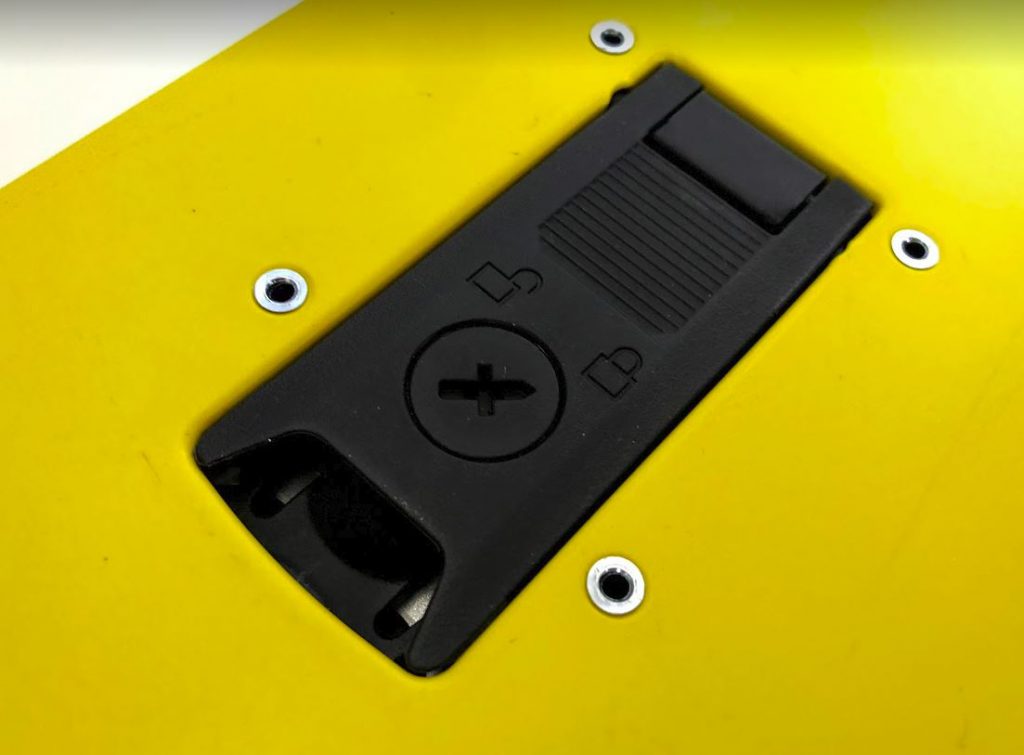
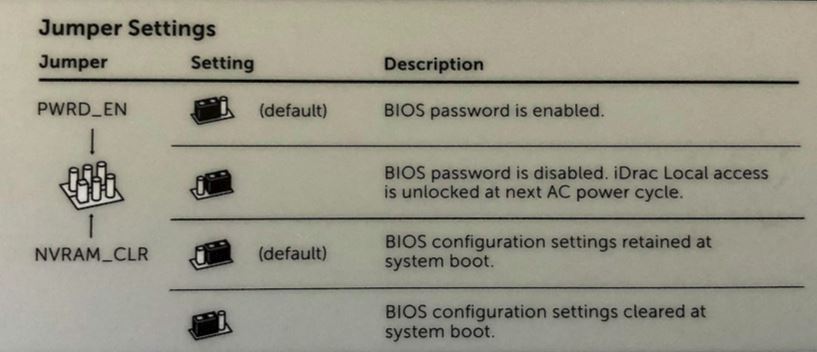
- Do not connect any power to your GSA just yet. Open the top lid of the GSA (image below – use a screwdriver to move the latch to the ‘unlocked’ position), and change the ‘clear nvram pin’ to yes, and the ‘bios password pin’ to no (image below – pull pins upwards to remove). The location of the nvram and bios password motherboard pins will be shown clearly on the inside of the top lid (image below).
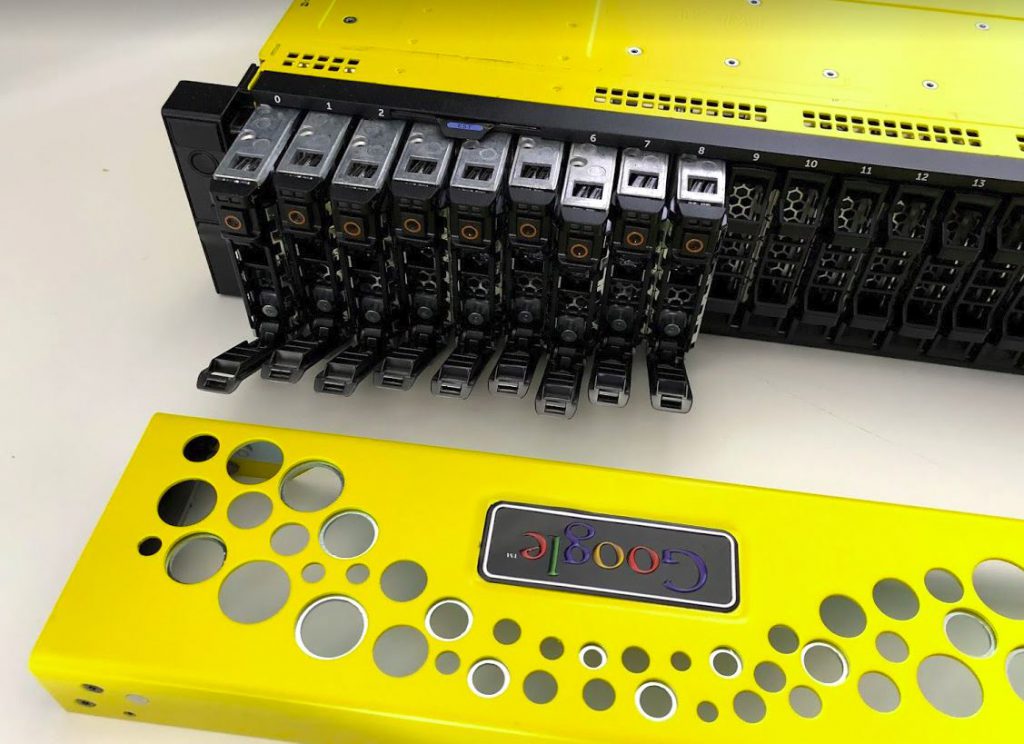
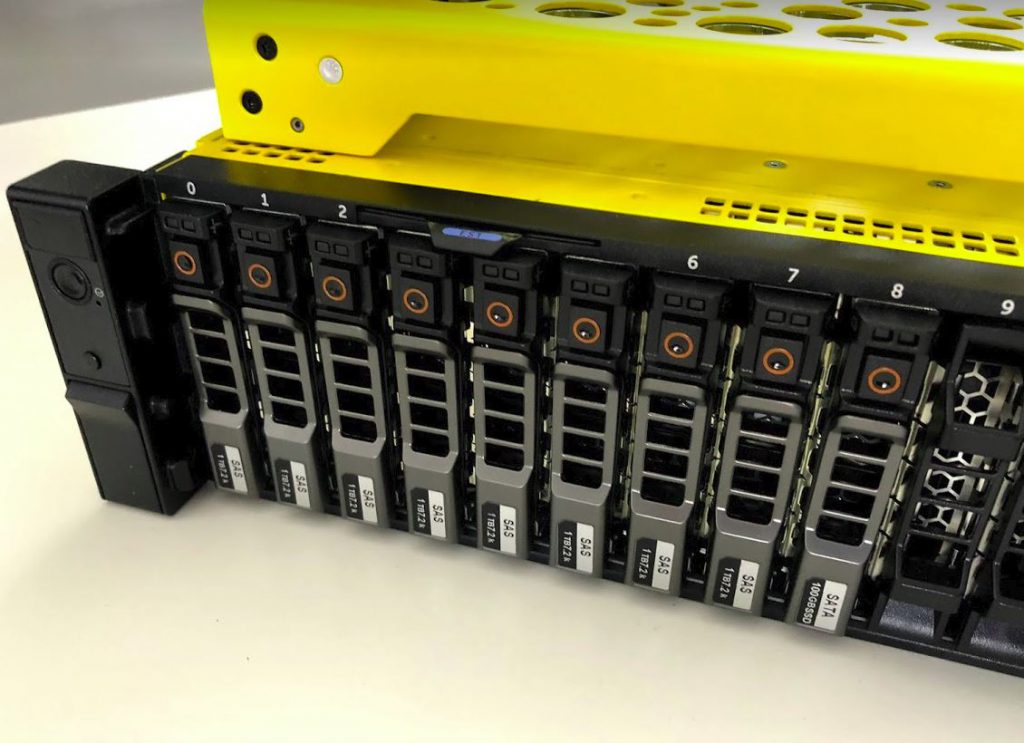
- Pop the server HDD disks out, and leave them hanging from the front of the server. (image below – the front bezel needs to be removed first)
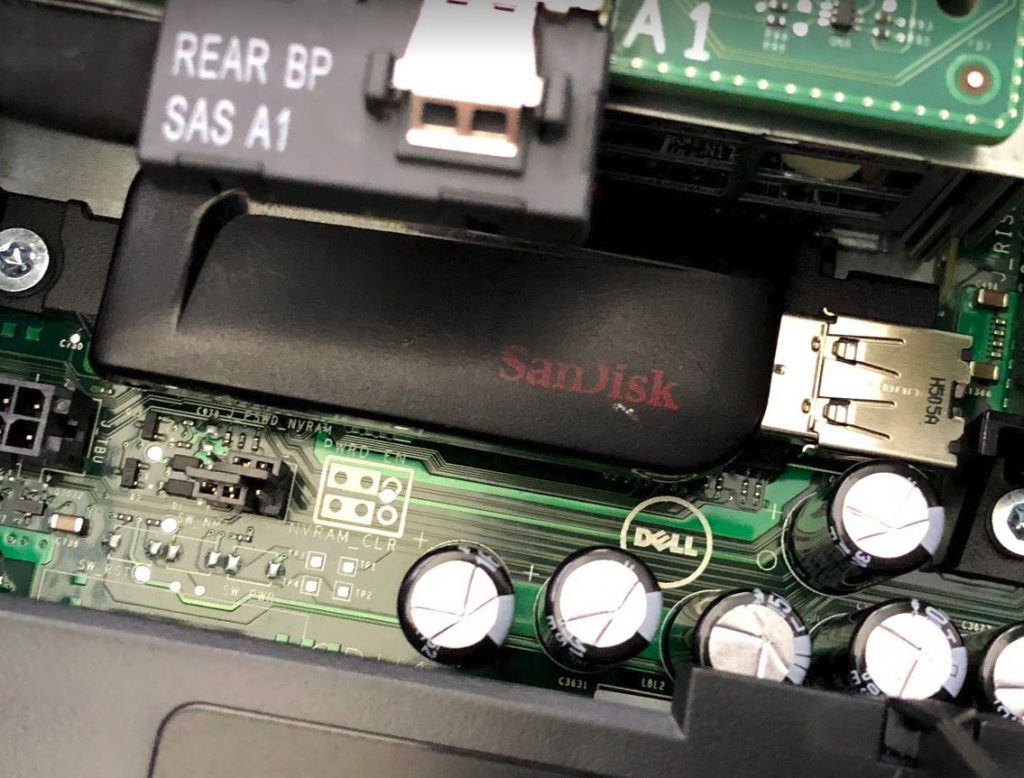
- Plug in your bootable USB stick. I usually plug the USB stick into the USB port on top of the motherboard. (image below)
- Re-install the top lid of the GSA.
- Connect your monitor, keyboard and mouse, and plug in the GSA power.
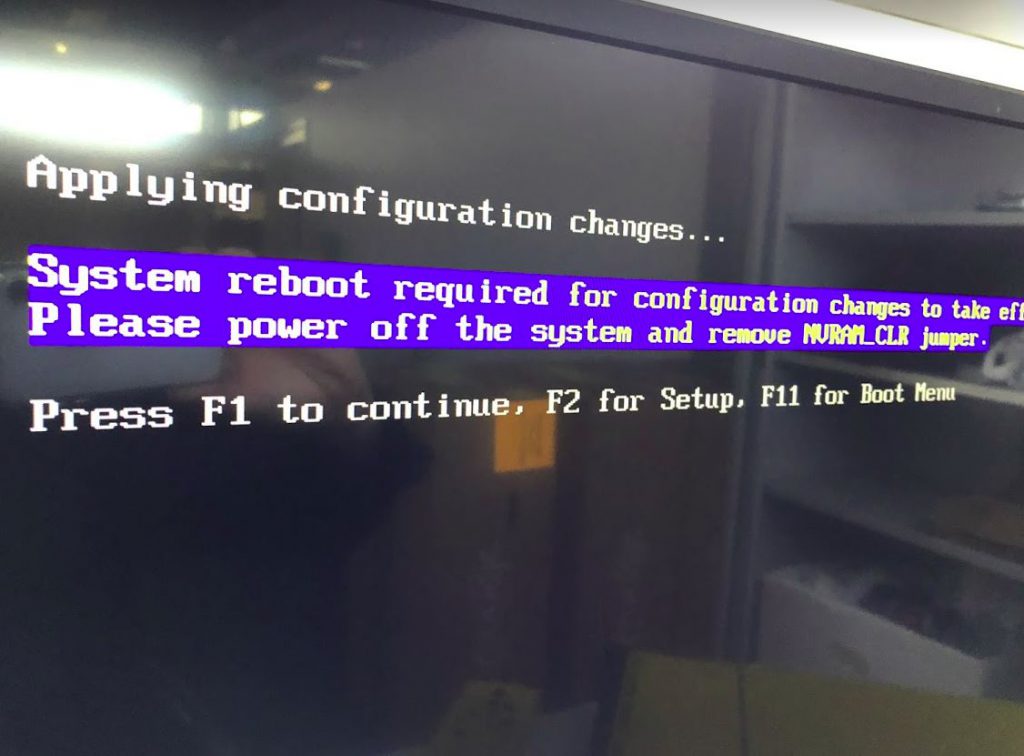
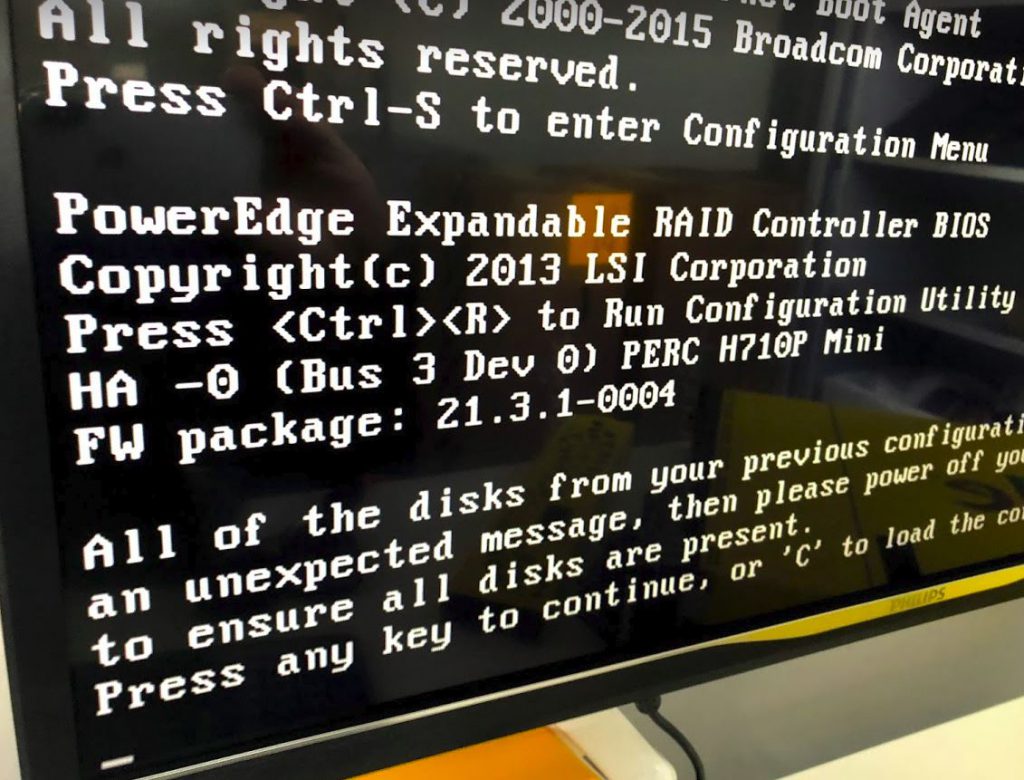
- Power on the GSA. Press F1 to continue when prompted. (image below)
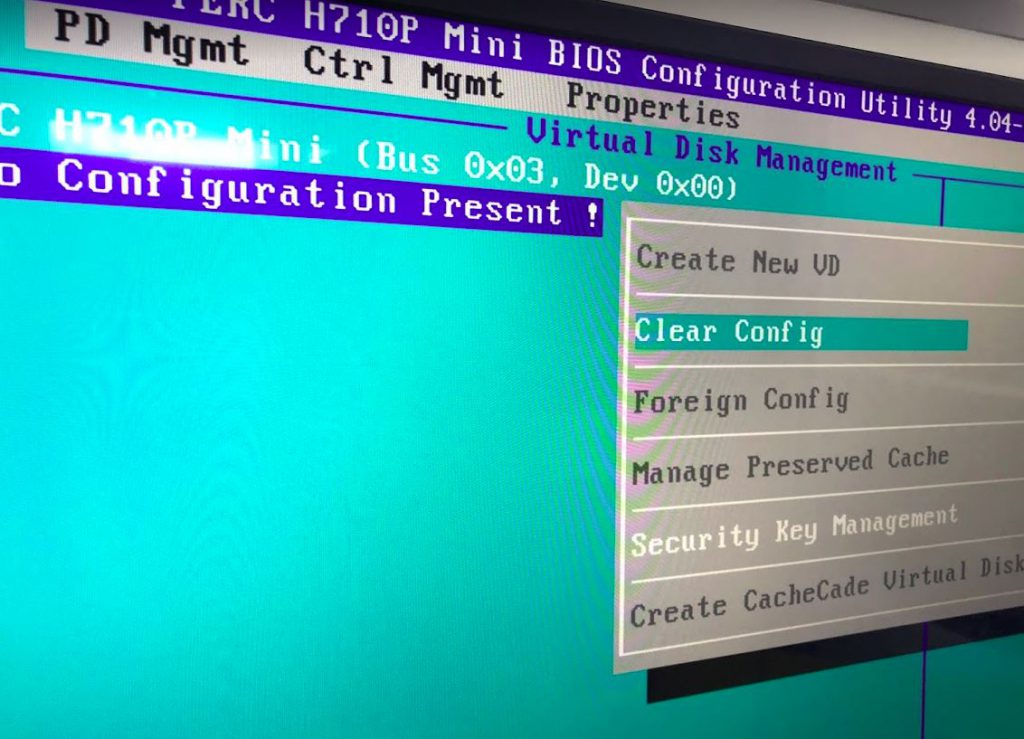
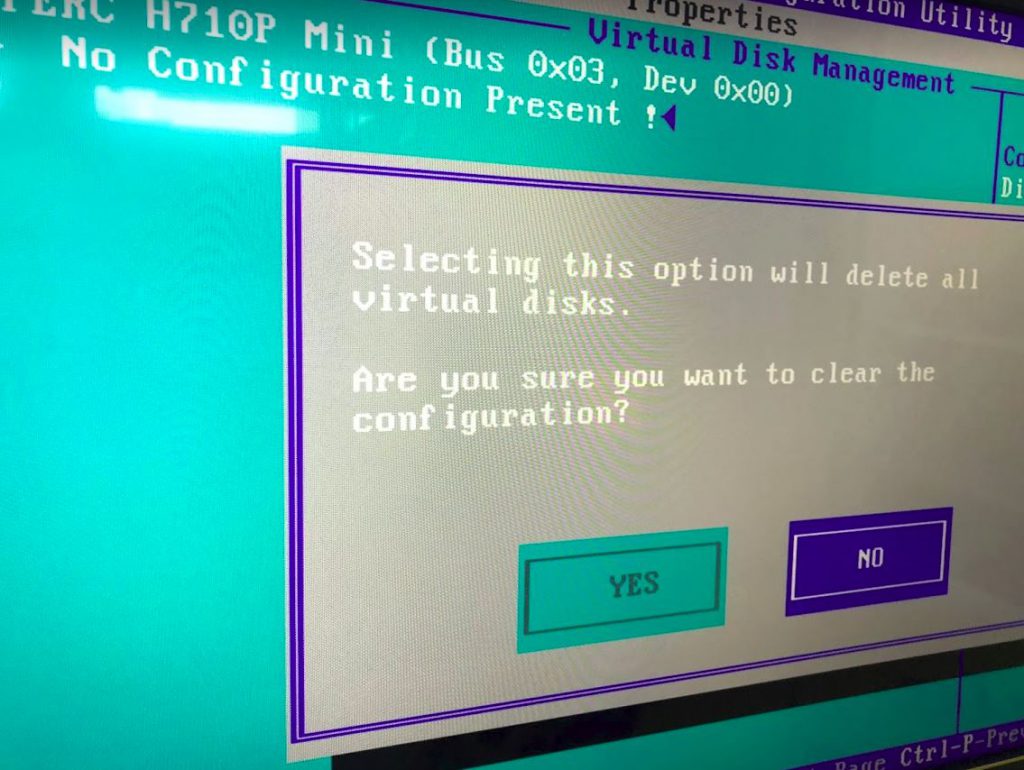
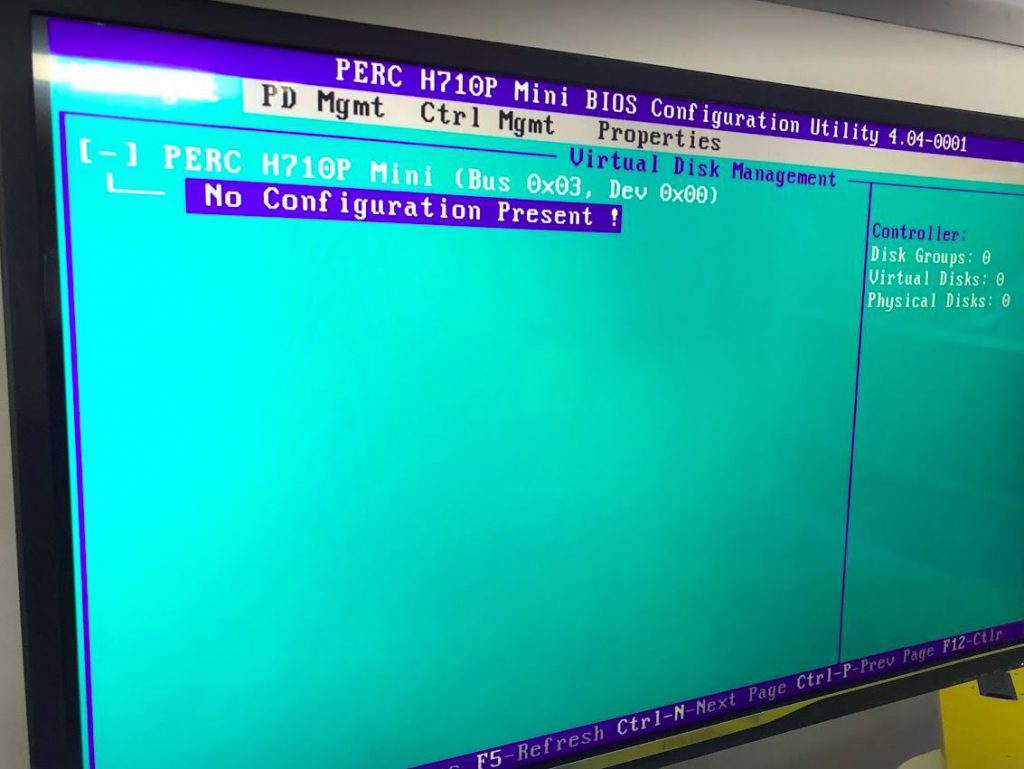
- Press CTRL – R when prompted by the BIOS, and enter the RAID configuration screen. Clear all of the configuration, including all volumes. (images below)
- Reboot the GSA.
- Allow the GSA to boot into your USB stick (Windows 10 in my case). Press SHIFT – F10 when at the installation prompt to launch a command prompt. (image below)
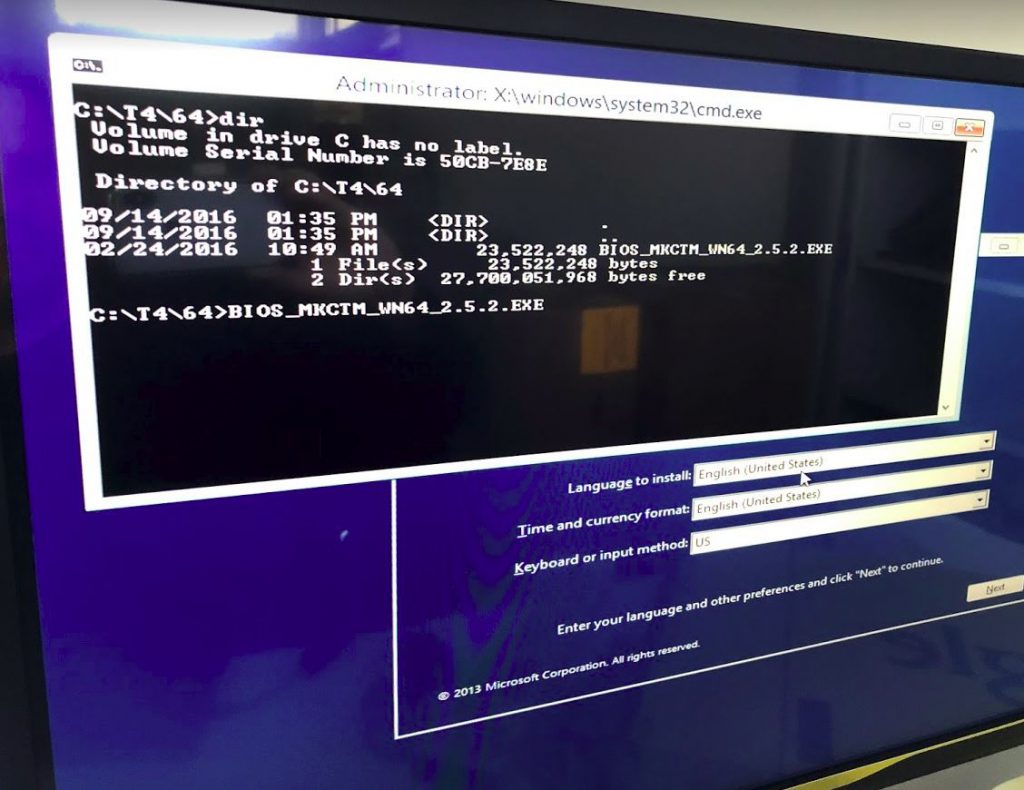
- Navigate to c:\BIOS
- Run your Dell supplied BIOS file (the one relevant to your GSA model: T2. T3. T4)
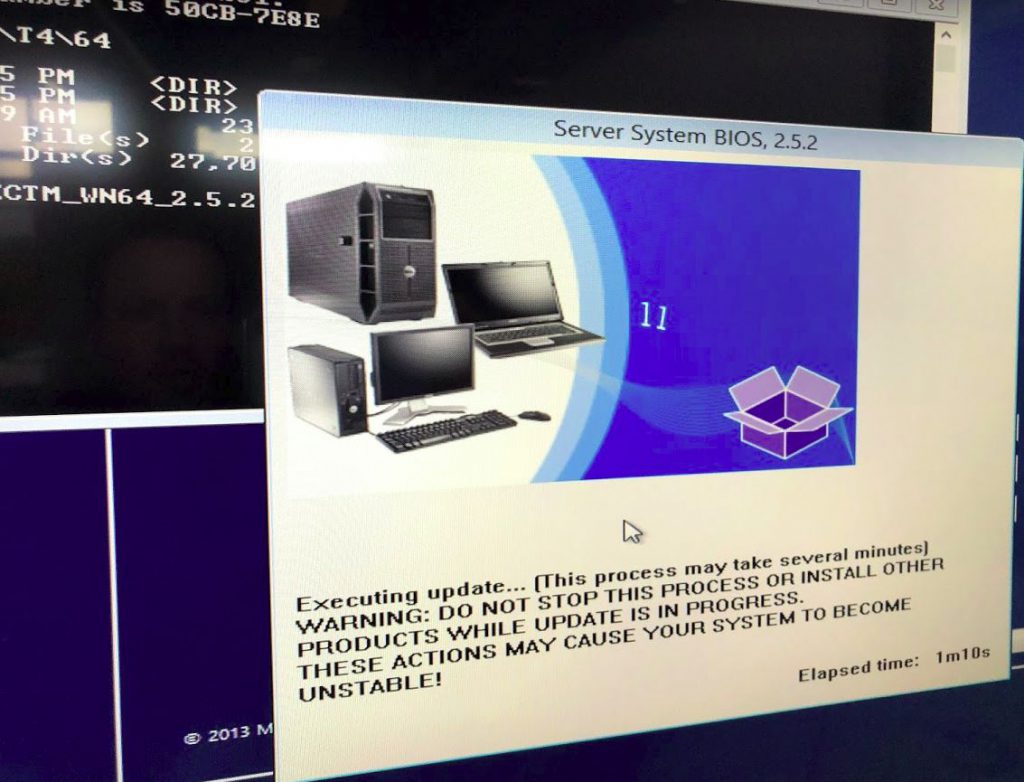
- Reboot when prompted. (image below)
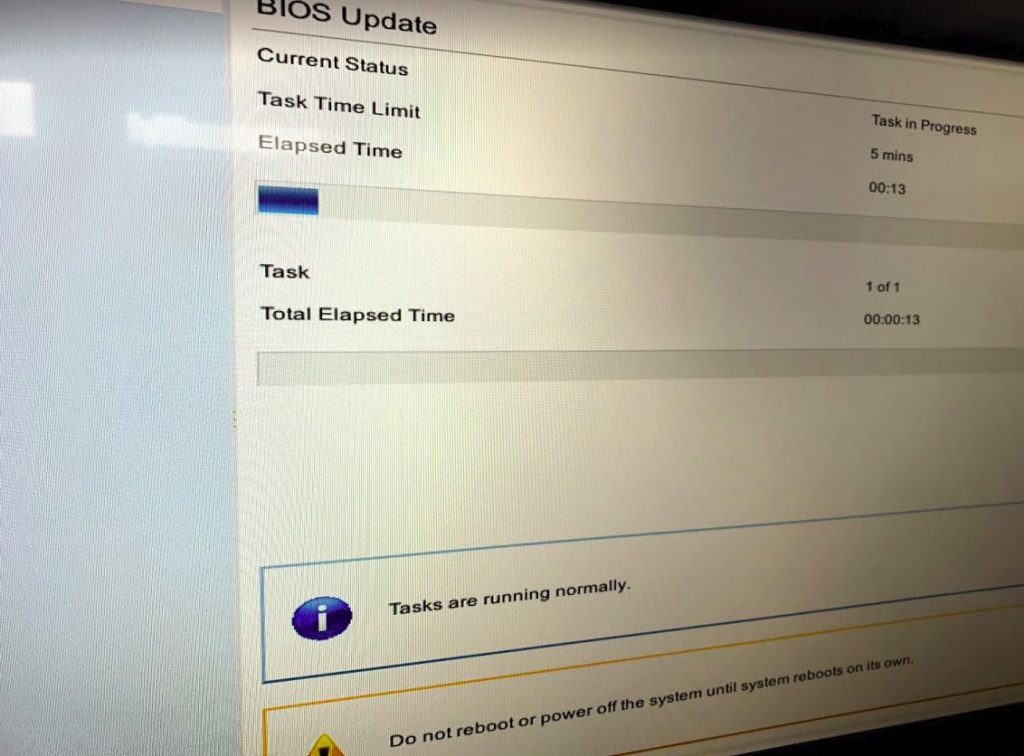
- Allow the GSA to continue booting, as the BIOS will have a second part to check and install. Reboot when prompted.
- Allow the GSA to boot a final time, and shutdown the server once your bootable stick is back at the Windows 10 install prompt. Remove power.
- Open the top lid of the GSA, change the ‘clear nvram pin’ to no, and leave the ‘bios password pin’ at no.

- Remove your bootable USB stick.
- Re-install the top lid of the GSA.
- Pop in the server HDD disks.
- Plug in the GSA power.
- Power on the GSA.
- Press DEL when prompted and check full access to the BIOS.
- Done. The server is now ready to have your chosen OS loaded.
Good luck. If you have anything to add to this process, please reach out and let me know! 🙂
Hello,
i tried also repurposing my GSA. But don’t get to the point where i can Press Ctrl + R, it asks me a password before. (After Configuring Memory, initializing iDrac and Caution NVRAM_CLR jumper … Two Processors… System Memory Size: 96G RAM, and then it displays:
Type the password and…
… press <Enter to leave password security enabled.
… press to disable password security
Enter password: _
It seems that the password disable jumper has no effect…
Any clues?
Thank you in advance!
What model of GSA are you trying to repurpose? T_?
From my experience, the CTRL-R option appears as a keyboard prompt during the boot process (POST).
I normally don’t get prompted for a password unless I try and access the BIOS by pressing F12, and this is impossible prior to cracking the GSA, as no-one knows the password other than Google.
Hi man I know this comes a little late but maybe someone else is watching this, since i search for ages,
Start your server with an 2012 R2 Server version via the SATA bus without any other plates connected to the server. Start cmd and type
“racadm systemerase bios,idrac,lcdata”
without any spaces after the commas
this will shut your server down and start itself again in the lifecyrcle. let it finish itself (can take up to 2 startups)
after this your bios idrac and ifecyrcle have no password and you can access everything
Have fun with your fully open server (PS i updated BIOS to version 2.11 also via the server 2012 R2 beforehand)
I haven’t tried this approach, but thanks for sharing!
This works for me but I still get the Google branding at start.
TJ you are absolutely correct. I haven’t been able to find a way to change the “Google GSA” BIOS splash-screen back to a standard blue and white Dell logo. Even with a completely unlocked BIOS, there is not provision to upload a replacement logo. If you find a way, please share it with me.
This is now documented.
https://www.dell.com/support/article/en-au/sln313210/how-to-reset-a-custom-bios-splash-screen-to-the-dell-splash-screen?lang=en
Yep I have the same issue as Jonas…
I have a GSA T4 with 96Gb ram etc… but cannot bypass that password. It is the the password to prevent system to boot from media not to access to bios. If asking password only when want access to bios that will be great!
Stuck on password
It is critical to follow the steps that I have provided. That BIOS password is only known by Google support, and you’ll never get it. To repurpose the GSA, you must take away the HDD boot options from the GSA, so that it is forced to search for an alternate boot method (USB stick in my case). I will endeavour to post a video recording of the entire GSA re-purposing process the next time I do it.
Thank you for your guide, on my GSA T4 (Dell PowerEdge R720xd) worked perfectly.
The harder part is find the right bios from Dell and the right live image to use for flash, I used Win 10 PE SE x64 and BIOS_H5VF3_WN64_2.6.1.EXE bios.
Thanks for the feedback. Glad it worked!
Do you know if this is still working with T5?
Thanks.
I haven’t had an opportunity to crack a T5 yet. I will update the article as soon as I do! 🙂
Just tried it on a T5 and worked for me! THANK YOU!
You’re most welcome!
Hi.
Thanks a lot for your tutorial. It worked perfectly. I had some troubles at first because of my boot drive, but it worked when I changed from Windows PE to a Windows 10 installer.
I could even change the logo at the splash screen following this tutorial:
https://www.reddit.com/r/homelab/comments/5zfd4e/new_how_to_fully_convert_google_r720xds_to_dell/
Hope it helps someone else
Best regards
thanks it works for me, 2 x T4 from Ebay
Good to hear! Thanks for the feedback.
are you using the iDRAC also? I’ve managed to replace with the Dell’s latest version (2.63.60.62), but in the iDRAC’s web interface, there is no “License” menu, really need this menu to upload trial license from this page:
https://www.dell.com/support/article/us/en/19/sln309292/download-idrac-trial-license-to-enable-poweredge-enterprise-features?lang=en
so I can use the remote console feature.
Hi, wondering if you can help, I’m stuck on step 13, it prompts me for the reboot I do it and then it says strike f1 to continue or f2 to system set up or f11 for Bios boot manager pressing f1 takes me to the bootable os I have on my flash drive but doesn’t carry on with any installation.
If you try and re-run the BIOS update, does it show that a new version has installed successfully? Or is the original GSA bios still installed? You may want to try and download an alternative version of the BIOS for your hardware type.
I am having the same issue. When Prompted to reboot, I click yes. It seems as if the original BIOS is still installed.
I was encountering this issue on R710 T3 GB-7007 running 2.1.15 gsa bios
solution was using freedos instead of windows with R710-060600C.exe /forcetype (use tab after changing directories and typing R710 as the path is shorthand and will act like you’re doing a typo)
Hopefully this helps others with the same issue. The original step wasn’t actually accepting bios update for me.
Keep pressing f1 when asked and it will take you to the 2nd part of the bios update
Hi- I’m glad this page is pretty current. I have a GSA T4 and boots, Initializes Memory and iDrac, then Initializes BIOS and goes right to the Password screen with a notice that the NVRAM CLEAR jumper is enabled. There is not option to hit Ctrl+R, Del or any F-keys to access the BIOS to clear. Basically, I’m stuck on Step 7. Is there something I’m missing? Thanks.
Please ensure that the appliance has no HDDs to boot into. You can try putting the NVRAM jumper to normal position and reboot the server.
I literally pulled out all the drives and confirmed that there were no other drives plugged into the back of the server, either. I also tried every configuration of changing both jumpers. Unfortunately, no luck. Thank you for the suggestion.
OK, and just to confirm, please don’t press DEL to access the bios. Without the drives plugged in, the server should initiate, post, pass through the RAID initialisation (where you would press CTRL – R and delete the volumes and wipe the drives), and then ultimately fail to load an OS. When it fails to load the OS, you will be prompted to try again, select boot device, or enter BIOS. Do you ever get this far?
Yes, I have NOT press DEL to access the BIOS, but never get text on the screen that even references a CTRL+R to access the Controller BIOS. When I startup the box, it checks Memory and iDrac, goes to the Dell BIOS screen with the Google Splash and a progress bar which completes and then goes to the Google Password prompt. It’s really a shame, because this is a pretty impressive box from a spec-wise, even if it is about 4-5 years old. Thanks.
OK that is strange. I would suggest trying a couple more things. Ensure the jumper pin for the bios password is set to unlocked. Return clear nvram pin to disabled. Now insert a bootable usb stick across 3 positions: front of server, rear of server, and as a final test, on the USB header on top of the motherboard. Good luck!
Have you ever successfully added a video card to a repurposed GSA? Any pointers?
Negative. My server is accessed remotely (mstsc, vnc etc), and rarely has a monitor plugged in via VGA (d-sub). As for other GPU tasks, like crypto mining, floating point workloads, I normally use my gaming desktop PCs. Anyone care to chip-in and offer some advice?
I just want to say thank you for the guide and it worked perfectly! It was very easy to follow. Cheers!
I got stuck on step 13 on my T3 with the second step in the BIOS update never happening. This worked for me using the /forcetype switch.
I followed all the instructions to the letter, and whenever I try to update the BIOS it keeps saying it is not compatible with the operating system? I used Windows 10. I am not sure if I am inept or if I am doing something wrong, any help would be appreciated. I have had this unit for almost a month now and I feel like it is basically a paper weight at this point.
I was wondering if you would be able to walk me through it? I have been following all kinds of instructions, I have been trying a bunch of different OS and BIOS version combinations, and every time it hits me with “This is not compatible with the version of I am running”. I have had this machine for a little over a month and it has been essentially a paper weight.
As a first step, please check the “Dell service tag” sticker which should be on the appliance. Then use the Dell service tag lookup tool to confirm what sort of server is under the yellow GSA paint. You’ll then be able to download the correct Dell server firmware for the box. Once you have the right firmware, and if you are still getting the compatibility error, you can try the “force” flag as per the article/instructions here: https://www.dell.com/support/kbdoc/en-au/000136752/command-line-switches-for-dell-bios-updates
Thank you for your response. I have downloaded the correct BIOS version from Dell’s website, I have applied the /f /s flags and I still get “name.exe is not compatible with the version of Windows you’re running. Check your computer’s system information and then contact the software publisher”.
I am not sure what I am doing wrong. I am following the steps to the letter in the guide.
I tried it with Windows server 2012 R2 and I got a different error this time while trying to update the BIOS. “The subsystem needed to support the image is not present”